Parallel Projections
Introduction
A view of an object is known technically as a projection.
Projection is done,
in theory, by extending lines of sight called projectors or visual rays from the
eye of the observer or station point (SP) through lines and points on the
object to the plane of projection (PP). Projectors that appear to converge at a
vanishing point (VP) are called perspective projections and are used in
technical sketching. Projectors that remain parallel to the object and
perpendicular to the picture plane are called parallel projections and are used
in technical drawing and drafting applications.
Parallel
projections
Parallel projections are projections where visual rays remain parallel to the
object. Regardless of the relative positions of the object, the plane of
projection, and the distance from the observer, parallel projections of objects
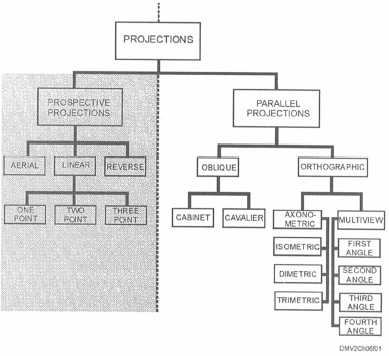
have the same dimensions as the objects. Parallel projections may be further
classified into oblique and orthographic projections.
Figure 6-1 shows the classification of major projections.
Figure 6-1.—Projections.
6-3


