Orthographic Projections, Continued
Isometric
projections
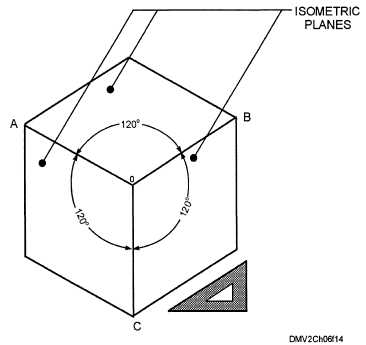
The term isometric means equal measure. When principal edges or axes
make equal angles with the plane of projection and are equally foreshortened,
the result is an isometric projection. Because all angles and lengths are
equal, you can used the same scale for the entire layout. The three edges that
intersect nearest the location of the observer are known as the isometric axes
(O) and are 120° apart. The three surfaces shown are referred to as
isometric planes. Lines parallel to the isometric axes are called isometric
lines. Lines not parallel to the isometric axes are called nonisometric lines.
You can generally draw isometric projections without additional auxiliary or
revolved views. Most exploded views use isometric projection. Isometric
axes and isometric lines are easily constructed with a 30°/60° triangle.
Isometric projection is the most frequently used type of axonometric
projection.
Figure 6-14 is a cube in isometric projection.
Figure 6-14.—An isometric projection of a cube.
Continued on next page
6-17


