5.
6.
7.
8.
the 2-4 means the weld should be 2 inches long
(L) with a center spacing or pitch (P) of 4 inches.
This shows the supplementary symbols. This
supplementary symbol means the weld should
be convex.
This shows the finish symbol, G, which means
the weld should be finished by grinding. Note
that the finish markings that show the degree of
finish are different; they are explained in chapter
4.
This shows the tail. It is used to set off symbols
that order the machinist to use a certain process
or to follow certain specifications or other
references; in this case, specification A-1. The
tail will be omitted if it is not needed for this
purpose.
This shows the specifications, process, or other
reference explained in item 7. In this example,
the tail of the symbol indicates the abbreviation
of a process-oxyacetylene welding (OAW).
(The abbreviation standards for every welding
process are beyond the scope of this manual and
have been omitted.)
Figure 7-5 illustrates the various welding symbols
and their application.
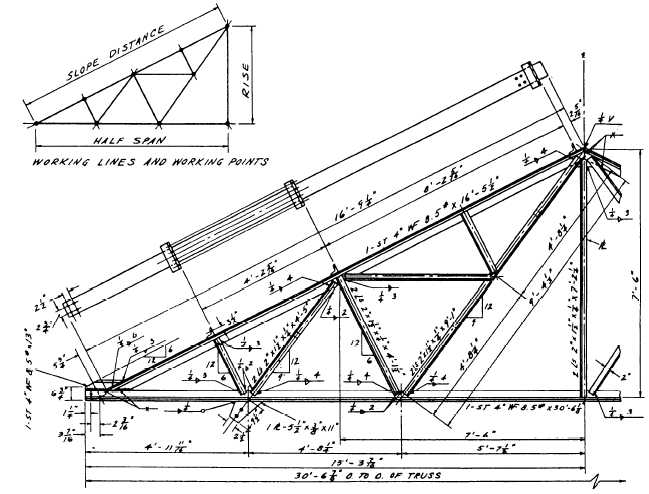
WELDED STEEL TRUSSES
Figure 7-6 is a drawing of a typical welded steel
truss. When you interpret the welding symbols, you will
see that most of them show that the structural angles will
be fillet welded. The fillet will have a 1/4-inch radius
(thickness) on both sides and will run along the angle
for 4 inches.
RIVETED STEEL STRUCTURES
Steel structural members are riveted in the shop
where they are fabricated to the extent allowed by
shipping conditions. During fabrication, all rivet holes
are punched or drilled whether the rivets are to be driven
in the field or in the shop.
Figure 7-6.—Welded steel truss.
7-7


