Tolerances, Continued
Size,
DESIGN SIZE: The size from which you derive the limits of size by the use
(Continued)
of tolerances.
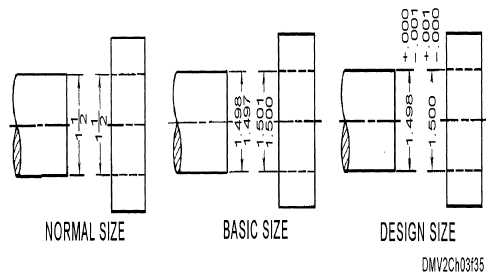
Figure 3-36 indicates object size.
Allowance
Figure 3-36.—Indicating object size.
Limits, allowance, unilateral tolerance, and bilateral tolerance refer to size
allowable variations.
LIMITS: The maximum and minimum sizes indicated by a toleranced
dimension. For example, the limits for a hole are 1.500 and 1.501 inches
and for a shaft 1.498 and 1.497 inches.
ALLOWANCE: The intentional difference between the maximum material
limits of mating parts. This is a minimum clearance (positive allowance) or
maximum interference (negative allowance) between mating parts.
UNILATERAL TOLERANCE: Unilateral tolerances indicate variation from
the design size in one direction.
Continued on next page
3-41

